November/December 2021 Newsletter
|
|
|
President's Message
John Dubelko
Greetings Members,
I continue to look for a committee chair to lead the scheduling committee. If interested, please let me know. The committee is well established and running smoothly. This is one of the more critical committees in that it oversees all the classes and other events Makersmiths offers. We really need someone to step up!
Each location will soon have lockers for members to rent. The plan is to have weekly, monthly, and six-month rentals. The six-month rentals will be done by signing up for a special event posted soon. If you are currently using a locker, please get in touch with Mary Waldron so the locker can be assigned to you. The shorter term rental will work by putting your name and period of the rental on a locker, and paying with one of the iPads. Items in unclaimed lockers will be placed in a lost and found area. If not claimed in 30 days, they will be disposed of. Both locations have limited storage space, so please read through the standing rules for more information on member storage.
I want to thank everyone for an incredible year of growth. We could not have done it without many hands pitching in to help. Happy holidays and see everyone in the new year!
John Dubelko
President |
|
|
KidWind 2022
Diane Painter
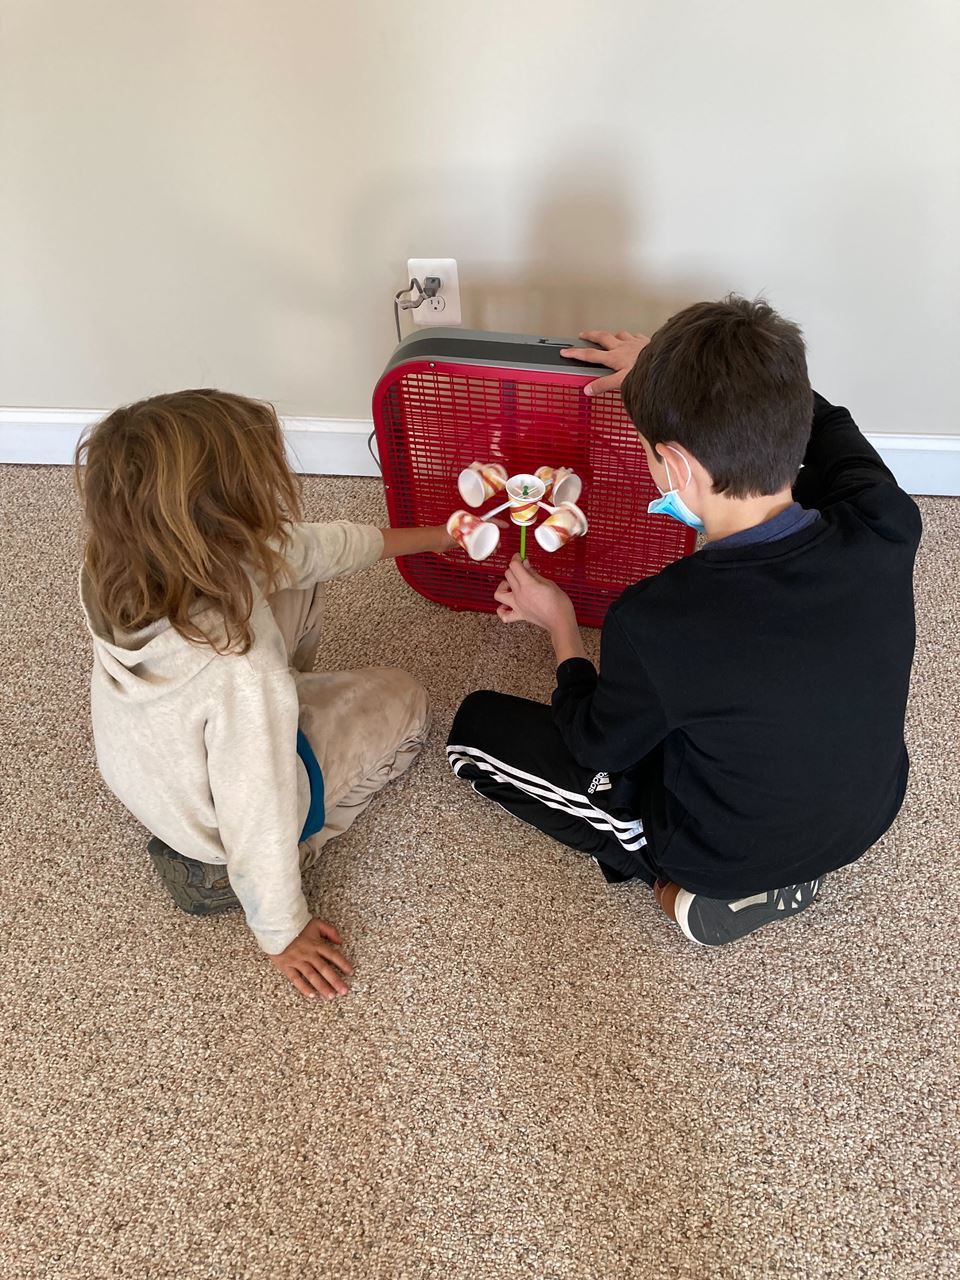
Dec 14 Ralph Pugh and Diane Painter will gave a simple machines workshop for third graders at Lincoln ES in Purcellville. The workshop culminated in Creepy Bots races! See photos below.
When we teach the simple machines workshops, we talk about gears, pulleys, levers, wheels and axles. We ask the children to identify the bits and pieces that make up creepy bots (wheels, axles, etc) and when assembled all together, we can make complex machines- like the Creepy Bots. Kids love it! We first did a workshop a few years ago for just the staff- Creepy Bots race and all! Since then we've done it each year for the third graders. We missed last year due to COVID. Creepy Bot Races at Lincoln ES |
|
|
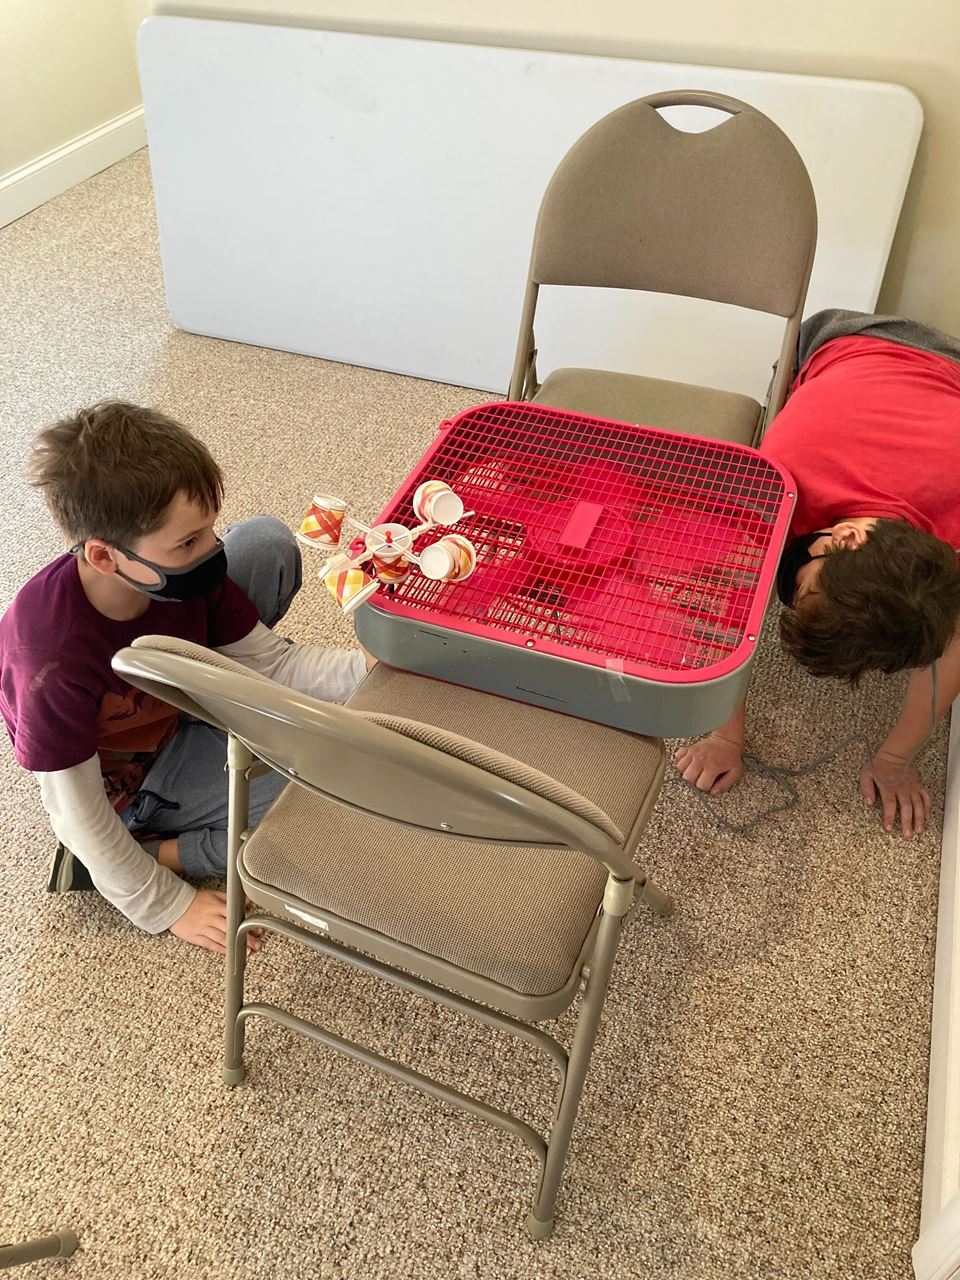
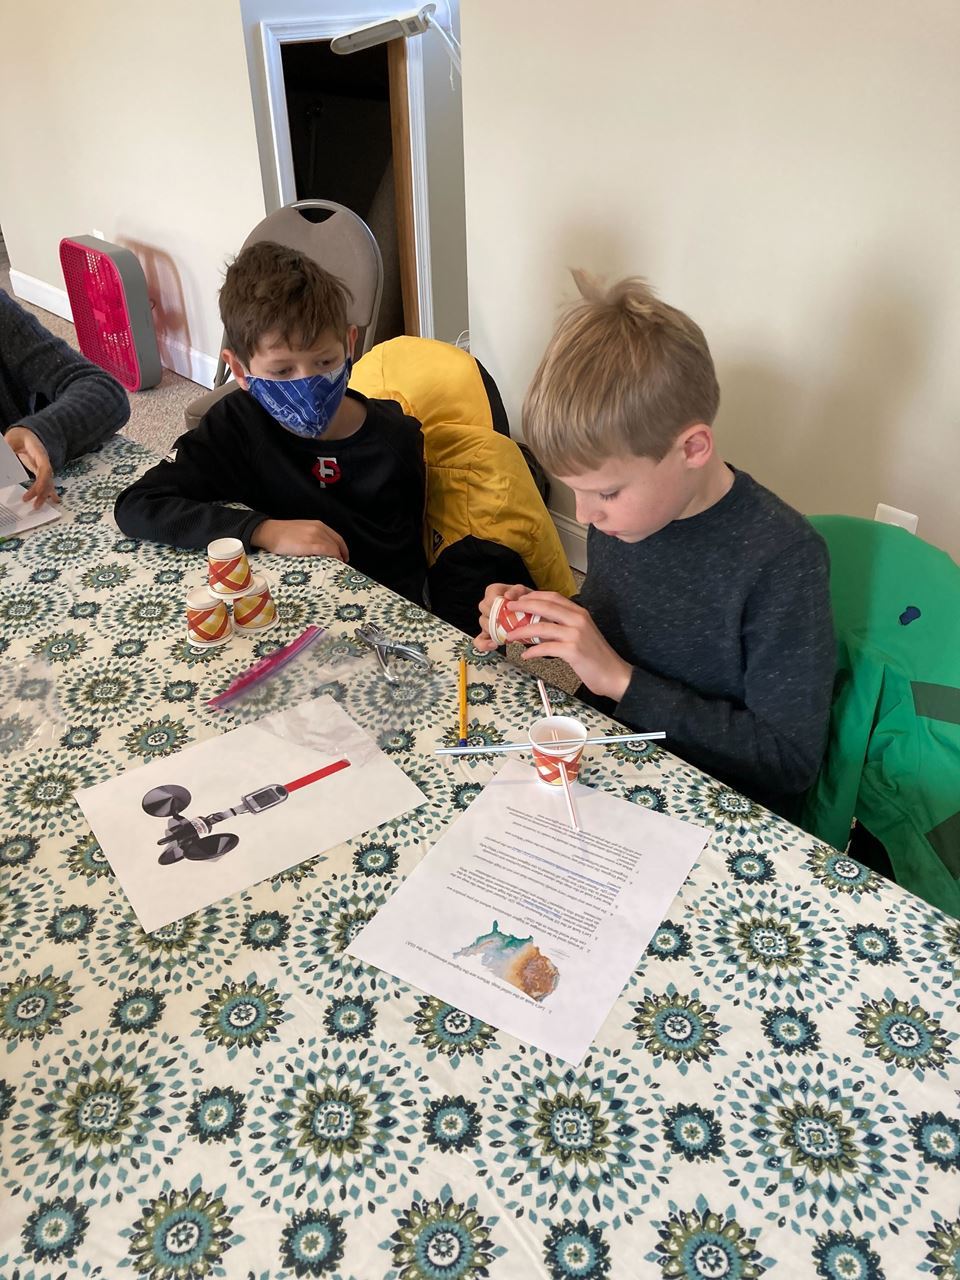
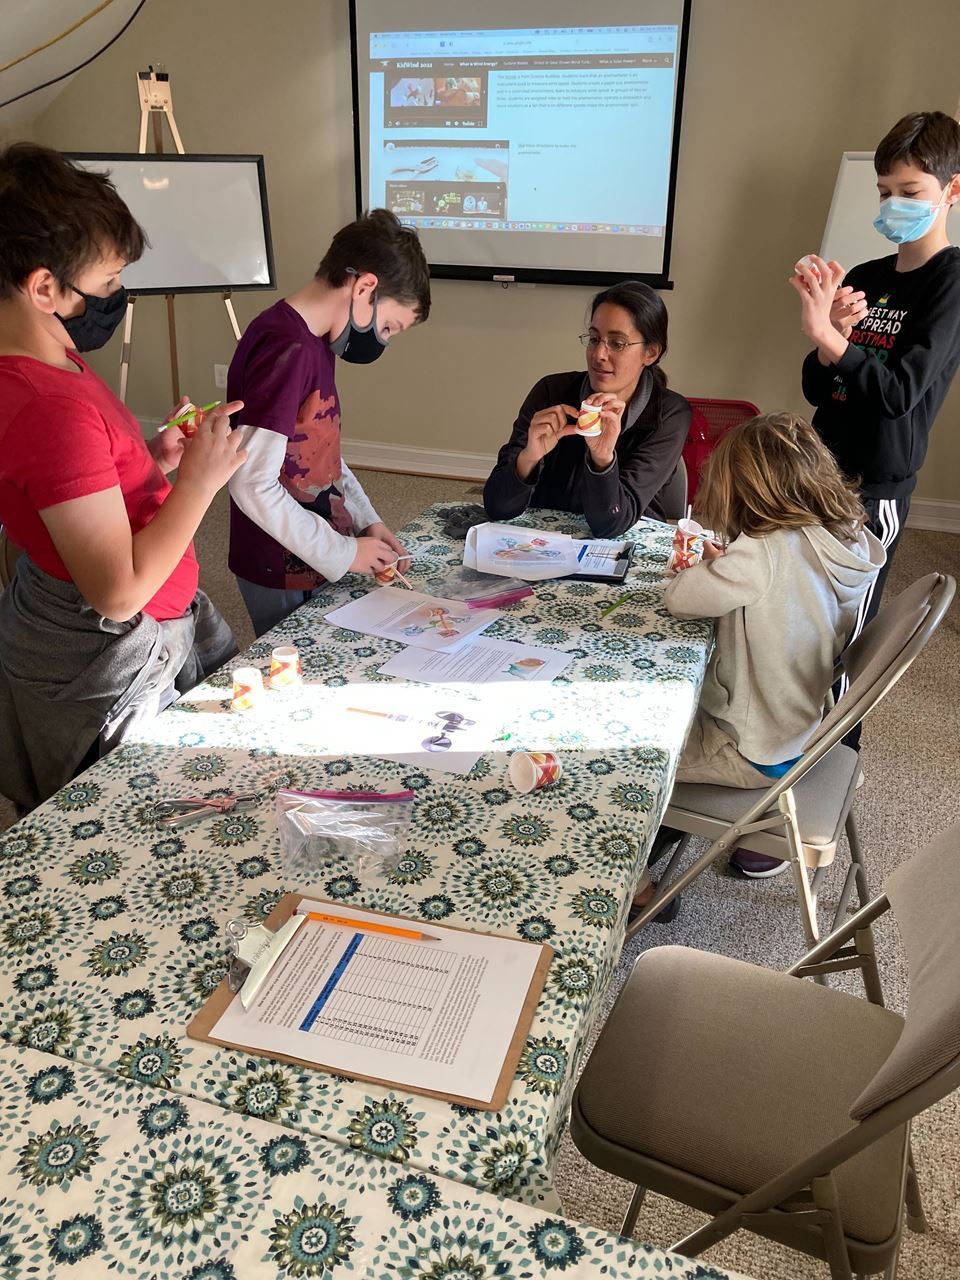
This year’s KidWind turbine teams
making anemometers and testing them out with fans
|
|
|
At the December 5-7 Virginia Society for Technology in Education Conference in Roanoke, Diane Painter, Educational liaison for Makersmiths, and Remy Pangle, Virginia’s KidWind Challenge coordinator from JMU, presented two sessions about Makersmiths KidWind initiatives. Diane showcased the projects our middle school teams completed in 2021 that won 1st, 2nd and 3rd places in the solar challenges. Remy Pangle will share how schools, non-profits such as Makersmiths and even parents can be trained as coaches and help students in grades 4-12 learn more about renewable energies as they design, build and test out wind and solar projects. Questions? Contact Diane.painter@makersmiths.org
|
|
|
Appalachian Trail
Tom Hill
In 2014, I hiked my first overnight on the Appalachian Trail, or AT. It was with a Boy Scout Troop and we were training them for an eventual high adventure trip. After getting them set up and in their tents, the other leaders and I sat around the campfire. We all had the same thought: This would be a lot more fun without the scouts.
Four years later, our sons were out of scouts, which freed up a week of vacation each year. Two of us (Makersmiths member Bob Kellogg and I) decided to set a goal of hiking the Virginia portion of the trail, which actually makes up 1/4 of the total trail, and is where many who aspire to hike the full trek drop out due to the “Virginia blues” which tend to set in after you hike a long time in the same state. Since that first year of hiking, we’ve added crew members and completed 291 miles from the south and 81.7 miles from the north. We hope to join our two sections in the next year or so.
I’ve been trying to come up with ways to commemorate this journey. For the last couple trips, I made challenge ‘coins’ out of wood with varying tech available at Makersmiths. Each hiker gets one during the section we were hiking. For the long-term goal of doing more of the trail, I wanted something more substantial.
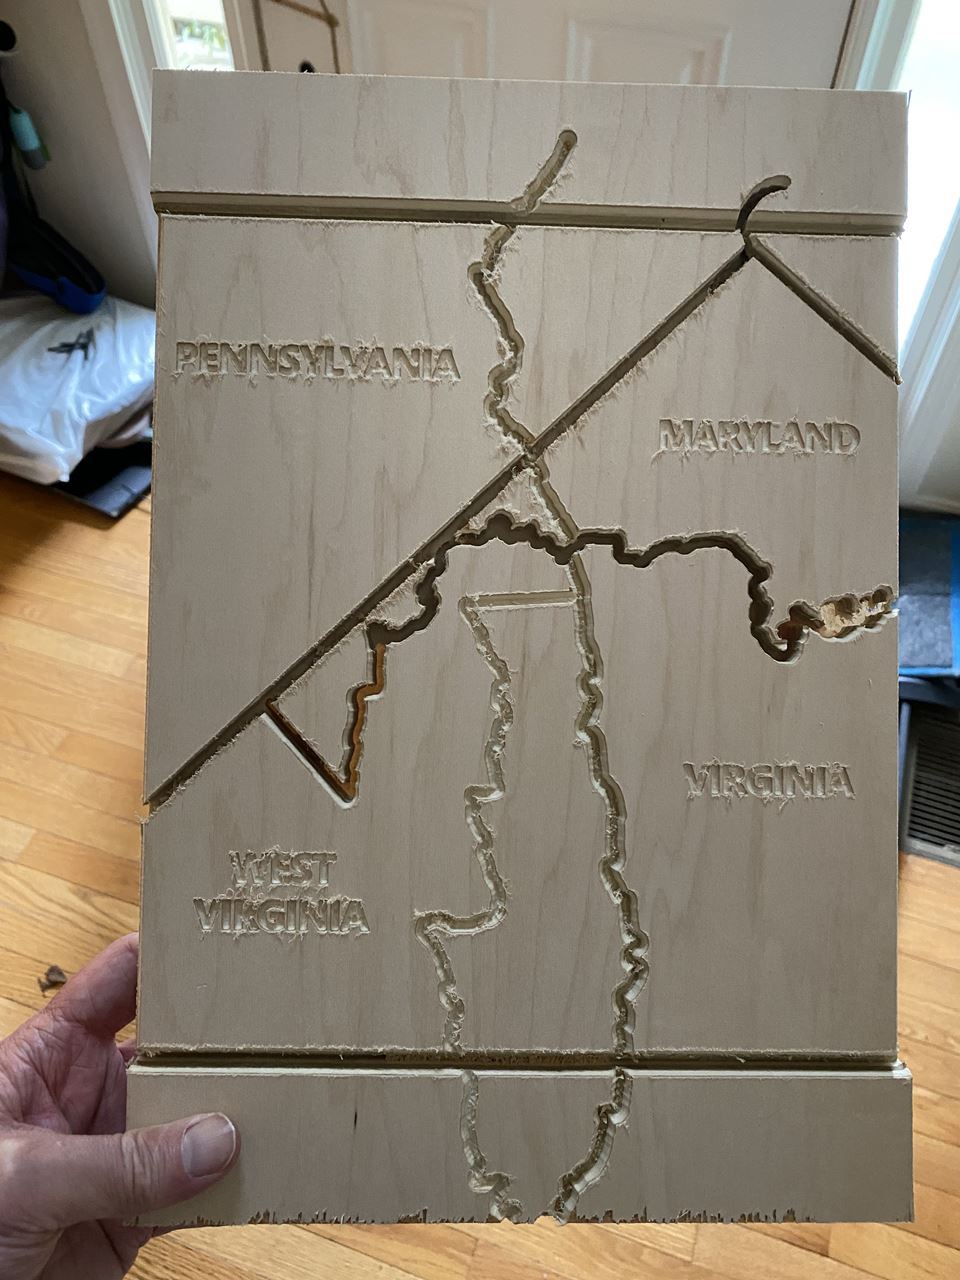
A wall map.
Lots of ideas have swirled…trying to do it in graphic relief, as a jigsaw puzzle, etc. Eventually, I realized I was stuck in ‘analysis paralysis’ which claims so many well-intentioned projects. It was time to press forward with one idea, and the simpler I could make it, the more likely it was to happen.
The basis of my map is the one from the Appalachian Trail Conservancy. In it, they orient the trail as being straight up, canting the actual north to the left. Tracing over the state lines and names as well as the AT’s centerline, an image starts to form. It becomes a puzzle that can be built up over years as different sections are completed.
The lines between the states are not as straightforward as you would think. To keep the overall image rectangular, there are parts of off-trail states depicted, such as South Carolina and Kentucky, so I needed to figure out the best way to group them together while keeping the flow of the puzzle. Virginia and West Virginia are connected at two points…the famous one near Harpers Ferry, and the less famous area where the trail straddles the state lines about 300 miles south. The funniest problem is Maryland, which has one segment that is only two miles wide (it’s near Hancock, before you go rushing off to your map) and two miles on this sort of scale turns into a real problem. In my test run, Maryland was basically cut into two pieces. My current thought is that since Maryland is only 40 miles of trail and many through hikers try to do it in one day, I should just batch it with Virginia and West Virginia. Ah…design swirl.
The way the building map puzzle is currently designed, it would be best displayed like a poster in portrait mode. There are other ways that could be done, though they would take some editing of the file. If the top of rectangular cutout is canted to the right, the trail could be shown in its actual direction as seen on a map, though without an update the state names would all be tilted by the same angle as the applied cant. Other displays of the AT are done horizontally, along the length of a wall for example. This is also doable, but would require another rotation of the labels.
At this point, I’ve completed a first draft of the whole map and I’ve done a test run of some of the first portions I was working. It was that picture which caught Melissa’s eye and led to this article. I’ve since fleshed out more of the map and will probably do another test run soon. |
|
|
|
|
|
|
|
|
MS-L Woodshop News
Mike Dewan
Leesburg Woodshop News
Please clean up after your finish your work. The shop has been frequently left with sanding dust and other wood residue over all the tools and the floor. Whatever your project activities require please clean the entire space before you leave. Sanding dust settles over all the machines not just the immediate area where you are working. Please be considerate of others using the shop and clean up when you finish.
New items in the Leesburg Woodshop-
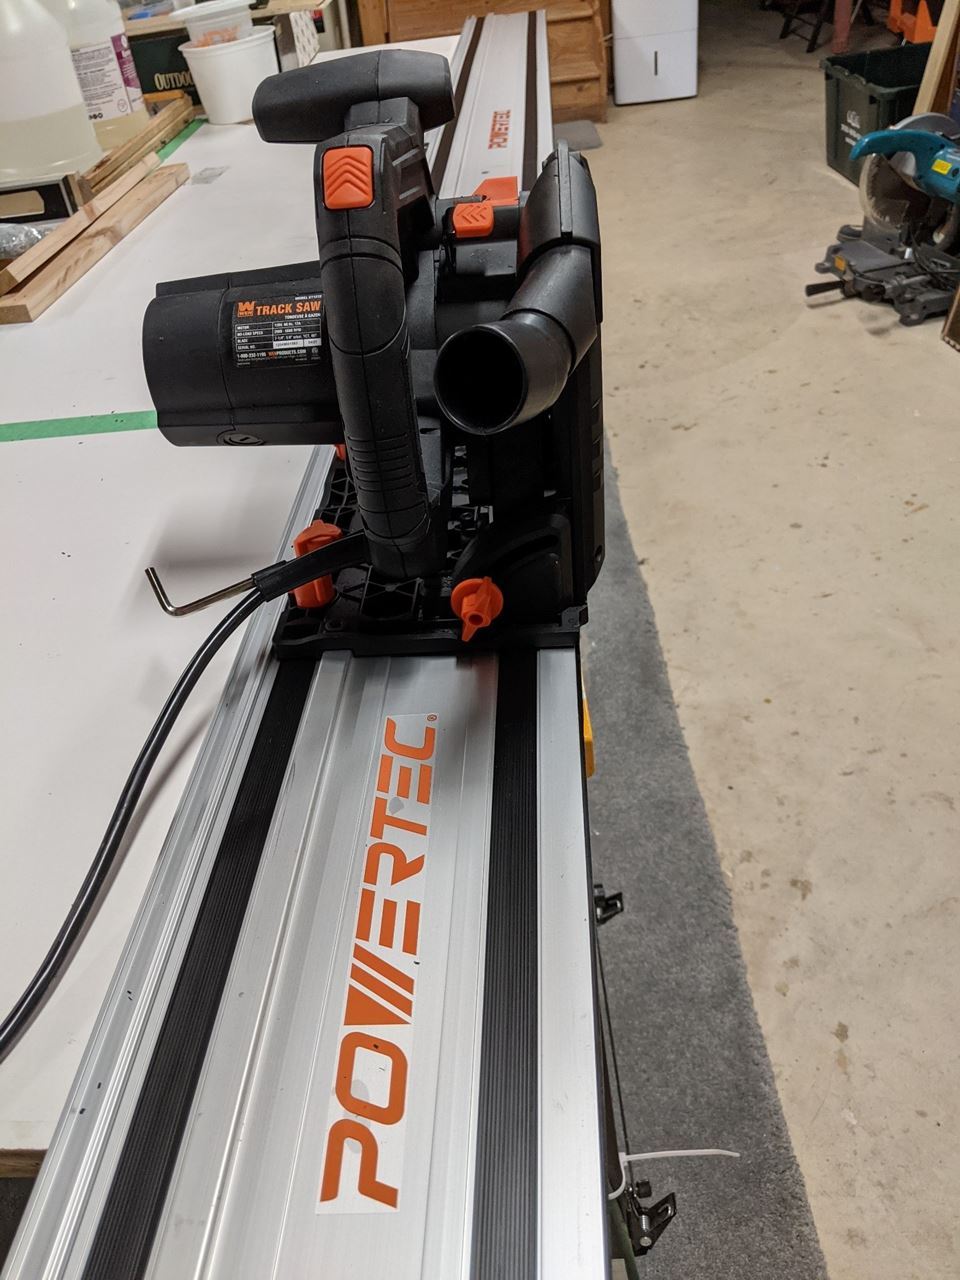
We have a track saw and track ( photo below) that will allow you to break down large sheet stock. The track is in 2 pieces each 50” that can be attached together to accommodate stock 8 Feet long. The track saw has a plunge capability along with depth stops and an anti-kickback feature. If you need instruction on using this saw and the track please contact one of the wood shop stewards and we’ll work with you. The track saw is only for use with the track. We have a 7 1/4” circular saw available if you just need to make cuts not requiring the track.
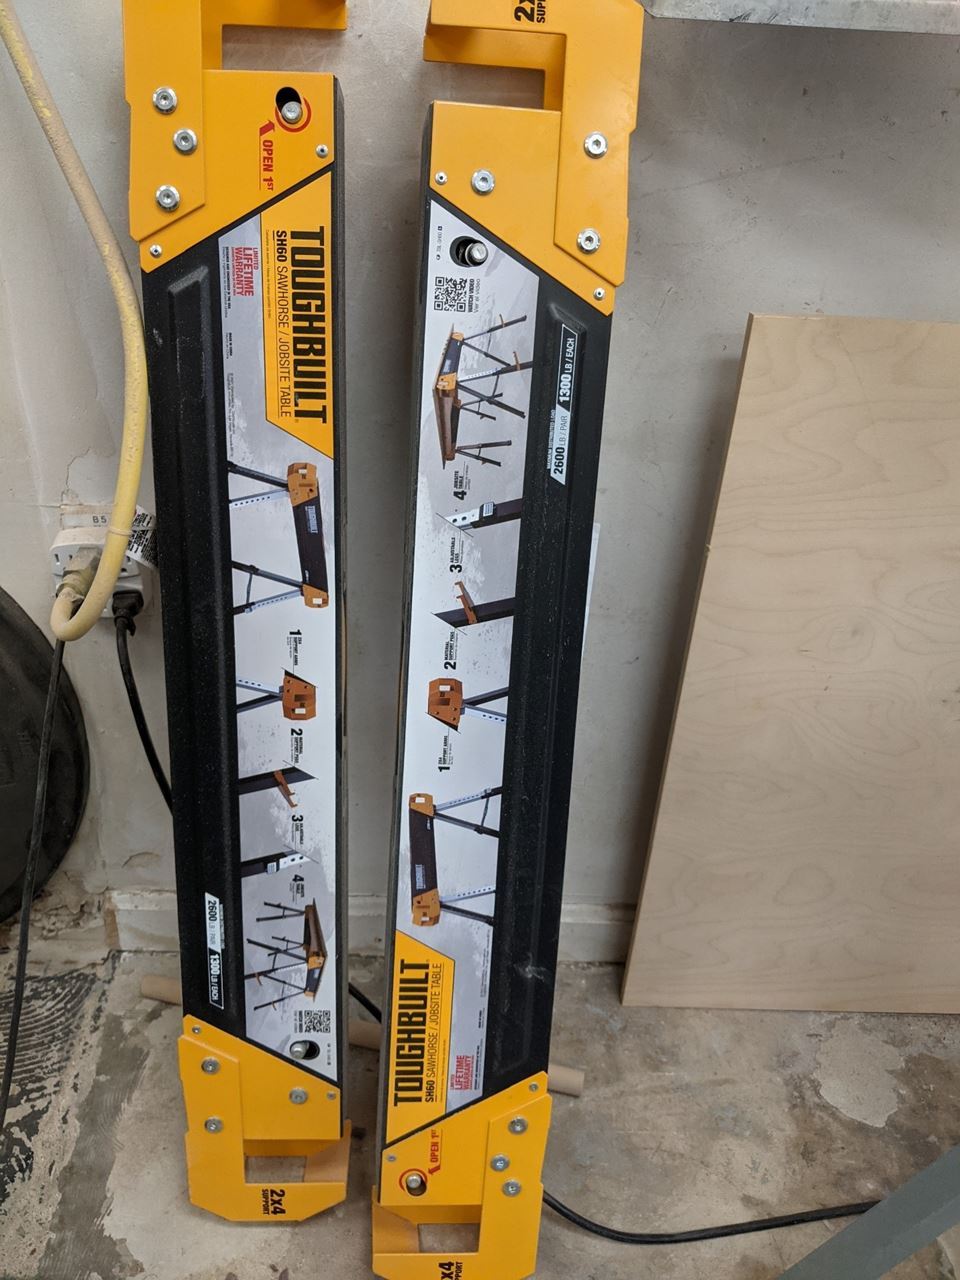
There are 2 portable sawhorses (photo below) that can be used to make handling large sheet stock easier when using the track saw. The sawhorses have side brackets to hold 2X4 lumber to provide stability for material that needs additional support.
A down draft sanding fixture connected to the dust collection system is available. It will reduce the air born sanding dust, but it will not eliminate all sanding dust.
Hand Tool Additions
A new set of vice grips in various sizes are available
A Screw driver set (standard and Philips in various sizes)
Pliers in 6” and 8” sizes are available
Wood file and rasp set
Aluminum drafting squares in 30, 45, 60, and 90 degree increments |
|
|
Plasma CNC
Jim Waldron
Plasma. The Stuff the Sun is made of.
If you have taken most any of our basic welding workshops, you have been introduced to the plasma cutter. It is a great tool for cutting metal up to about 1/4 inch thick. It uses air and a hot electrical arc to turn the air into plasma. Essentially a cloud of elemental particles at about 24,000 degrees ! (Hotter than the surface of the Sun - not hotter than the interior of the sun - but hotter than the surface.)
If you take that cloud of super hot particles and point them at a metal surface, the metal surface is literally vaporized.
If you have a metal project to cut out, you could use a hack saw, a saber saw, a jig saw, a band saw, or a metal chop saw, but if you have an intricate design in 1/8 inch steel, you will be cutting for quite awhile. The plasma cutter makes for quick work, has a very thin kerf, and the slag (if any) is usually quite easy to remove (vs. an Oxy/Acetylene cutting torch which pretty much guarantees a trip to the grinder to touch up the cut).
A plasma cutter can also 'pierce', or start cutting in the middle of a piece of steel. Oxy/Acetylene torches usually require starting your cut at an edge. Also, Oxy/Acetylene only works on steel. Plasma works on any conductive metal.
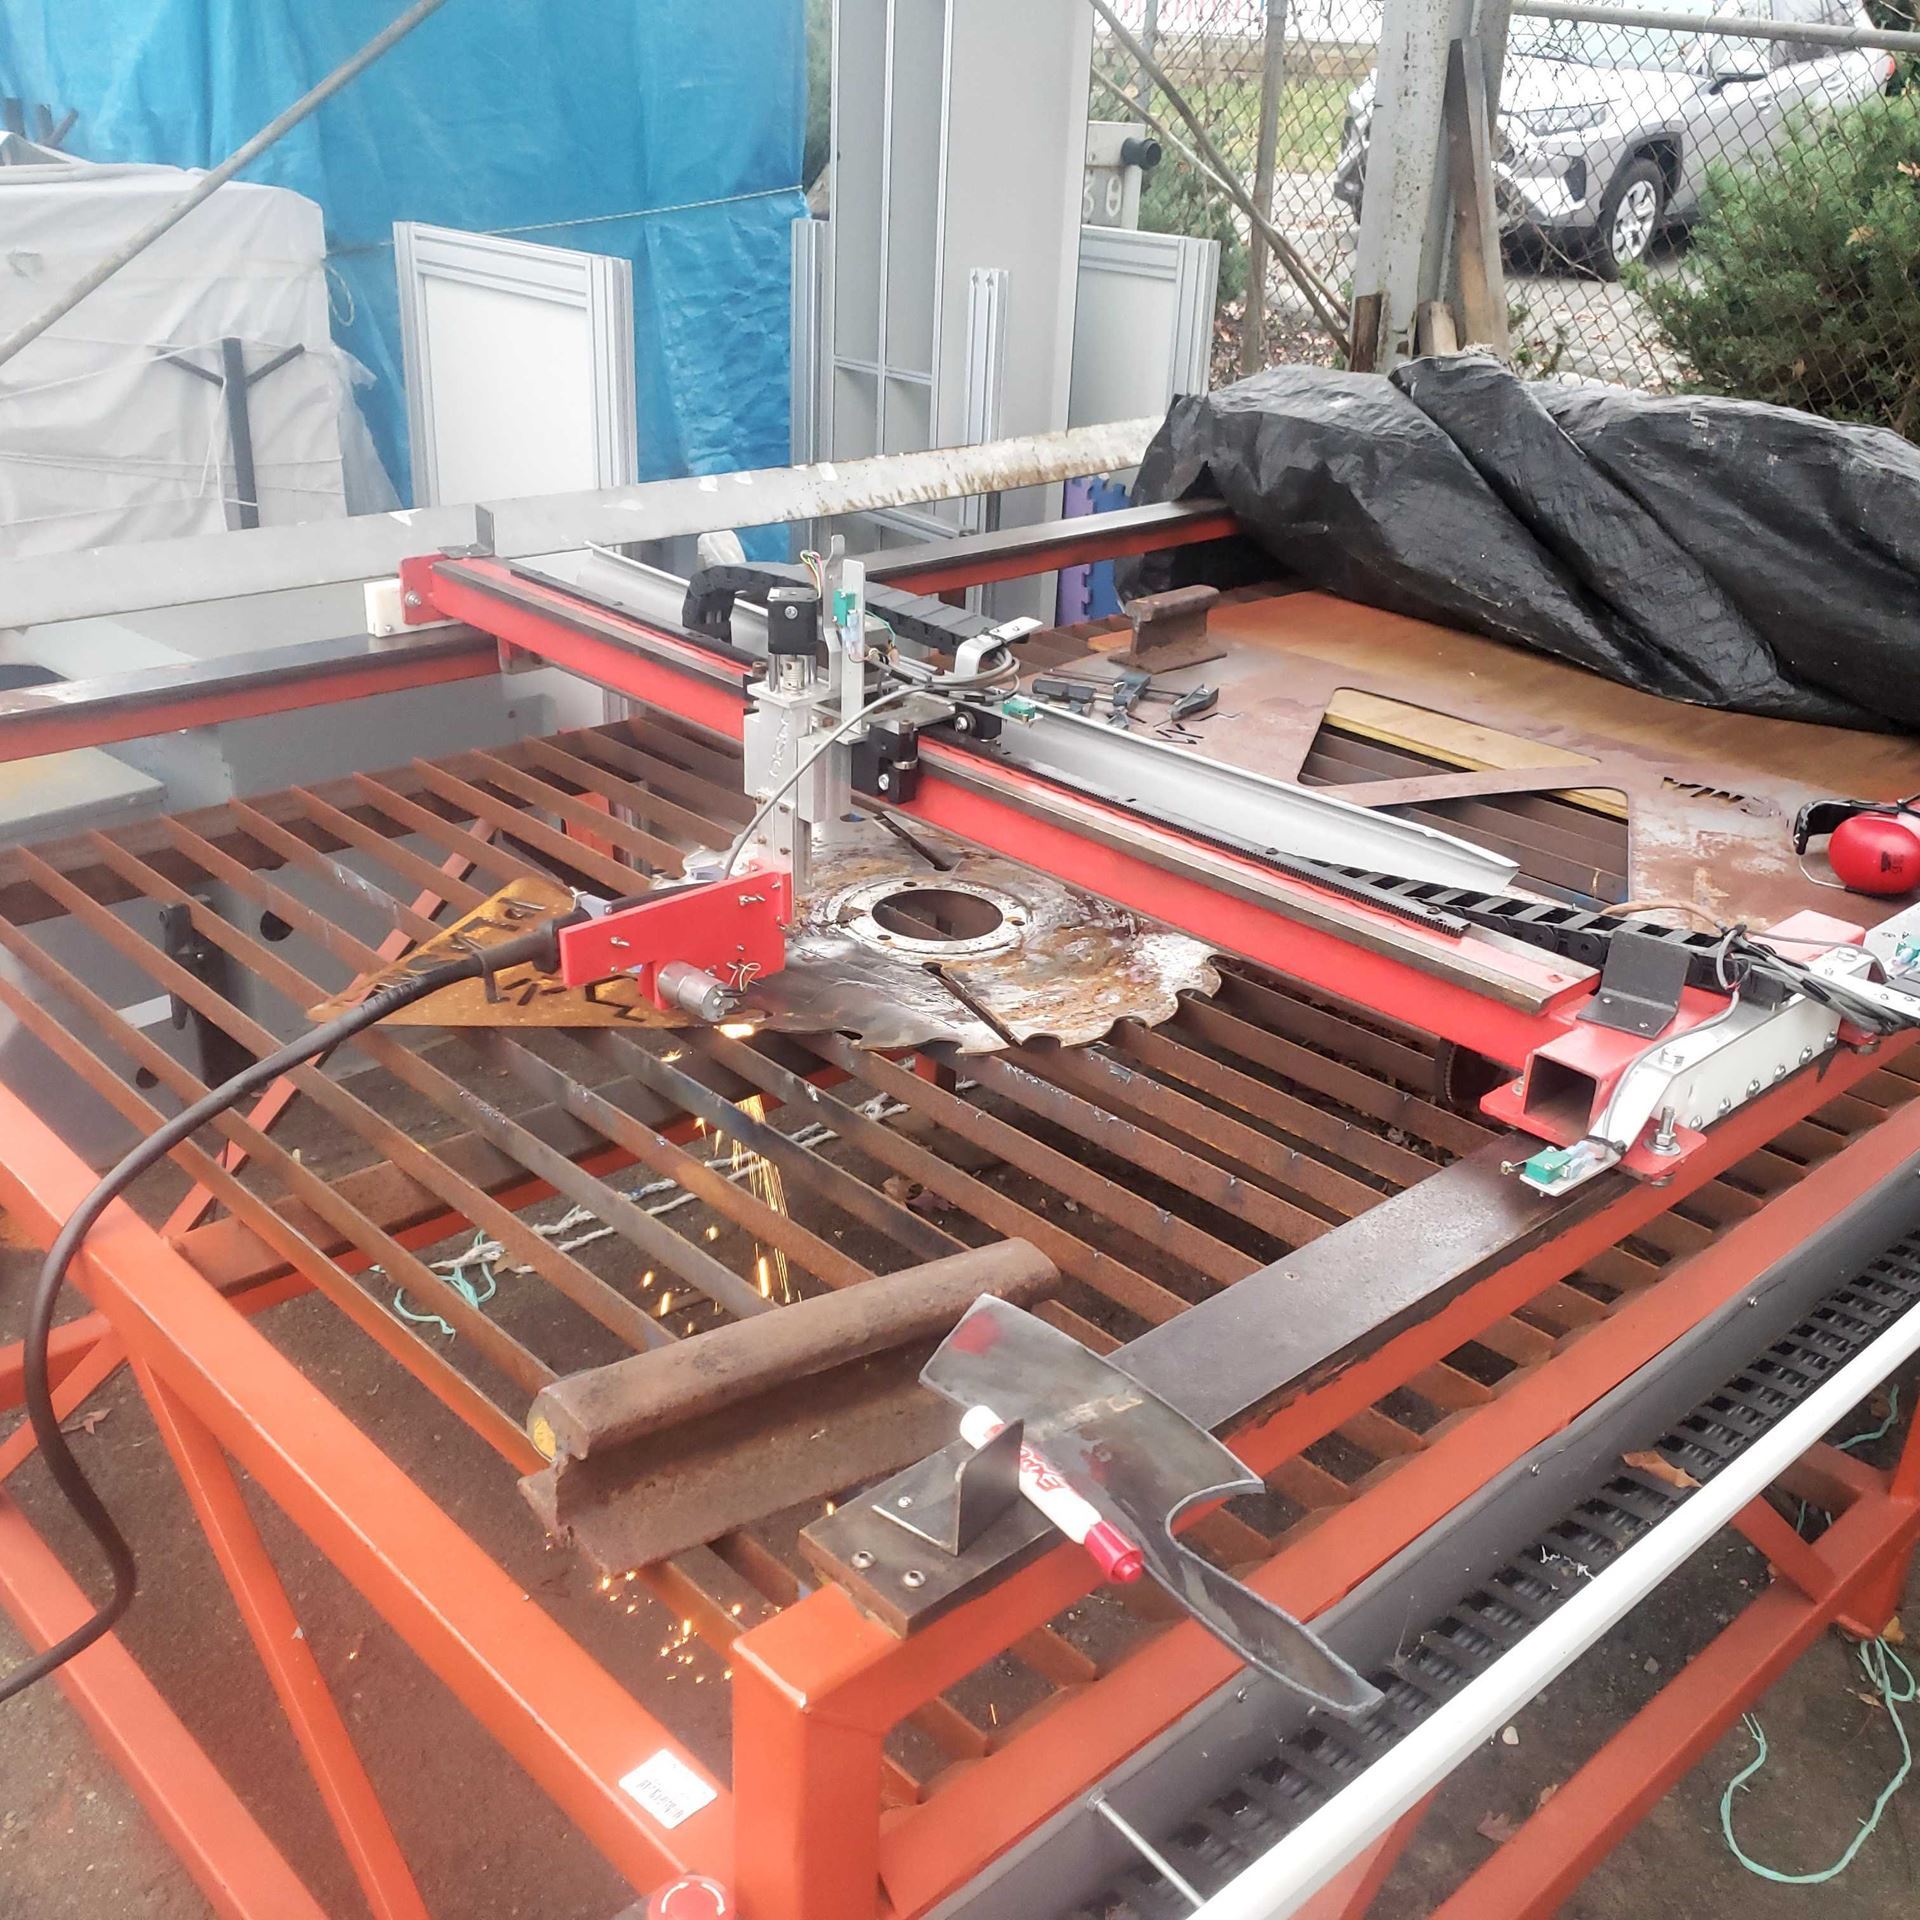
So, you cut out your design and it turned out really well. So well, in fact, that you decide you want 50 more. Yikes ! That' would be lot of time in a potentially shaky hand to cut out that many. Enter out Plasma CNC cutter.
Using any one of several tools, you can draw your design in CAD (Fusion 360, Corel, InkScape, or one of many others including some on-line versions) and use that design in a CAM program to spit out some Gcode. That Gcode can be run on our Plasma CNC table to cut the same pattern over and over again, while you just stand and watch.
Applications include signs, decorative markers, knife blanks, project parts, bench components, fire rings, and a host of other fun stuff.
The Plasma CNC uses our welding shop plasma cutter and is located in one of the shed bays at MS-P. We had a basic table, but had to make several new components to get it working (thanks Brad !). We added some blackbox hardware and a couple of steppers. All this is driven by a laptop computer (ours or yours).
It's a little cold outside right now for Plasma CNC workshops, but look for several once the weather warms up a little. |
|
|
Editor's Note - I was having a brain block and Jim provided this excellent explanation of plasma that is too good to not share. Enjoy! So, you are probably familiar with 3 states of matter, solid, liquid, and gas. There is a 4th state of matter called Plasma. If you were to take some Ice for example, you would have the solid state of water. Heat if up a bit so it melts and you will get the liquid state of water. Keep heating and you get steam, the gas state of water.
If you keep heating, the molecules get more and more motion from the heat energy and they start to bang together hard enough to knock the molecules of water (H2O) apart. Keep heating and the atoms star knocking their parts off until you wind up with a very hot collection of protons, electrons, and neutrons. This is plasma. It is also what is essentially the inside of the sun which is made up mostly of Hydrogen. A big cloud of very hot elemental particles. When some of those particles are fused together by the immense gravity of the sun to form Helium, a great deal of energy is released. This is Einstein's E=mc2 equation. The energy released is equal to the difference in mass between 2 hydrogen atoms and one helium atom. It is very small. But, if you multiply that times the speed of light squared (a very big number) it equals quite a bit of energy. |
|
|
Whatcha Makin' Today?
|
|
|
Chris Hom - Dragon Tail made at MS-L for a friend - 3 months and about 70 hours of work |
|
|
Jessee Maloney - Pet Ornaments for her sister. Look what our UV laser printer can do! Take the class, make your own! |
|
|
|
|
Pat Scannell - making knives were a nice side effect of Jim showing him how to use the CNC Plasma cutter and the new belt sander |
|
|
Upcoming Events
Click on the links for registration and more information
In this make-and-take class, participants will create three (3) of their own holiday ornaments using the laser cutter and UV printer. The laser cutter will be used to etch patterns and cut your shapes while the UV printer will add full color to make those ornaments look amazing! The possibilities are endless so please come with an idea of the style/type you want. Family photos are always a good option.
Dec 18 1-5pm MS-L Large Miniatures Painting
At the end of the class, each student will walk away with the mini that they have painted! We will do photoshoots with them and post them on Slack for everyone to see!
*In this class, you (as the student), will only need to bring an enthusiasm for painting and learning!
Jan 5 730-830pm Online Monthly Membership Meeting No registration required!
- What is important to you?
- What classes or events are you most interested in?
- Have you seen the new tools and improvements at Makersmiths lately?
- How can we improve the program of both locations?
- Come share your thoughts!
|
|
|
Makersmiths Leesburg: 106 Royal St SW, Leesburg, VA 20175 Makersmiths Purcellville: 785 S. 20th St, Purcellville, VA 20132 Unsubscribe |
|
|
|